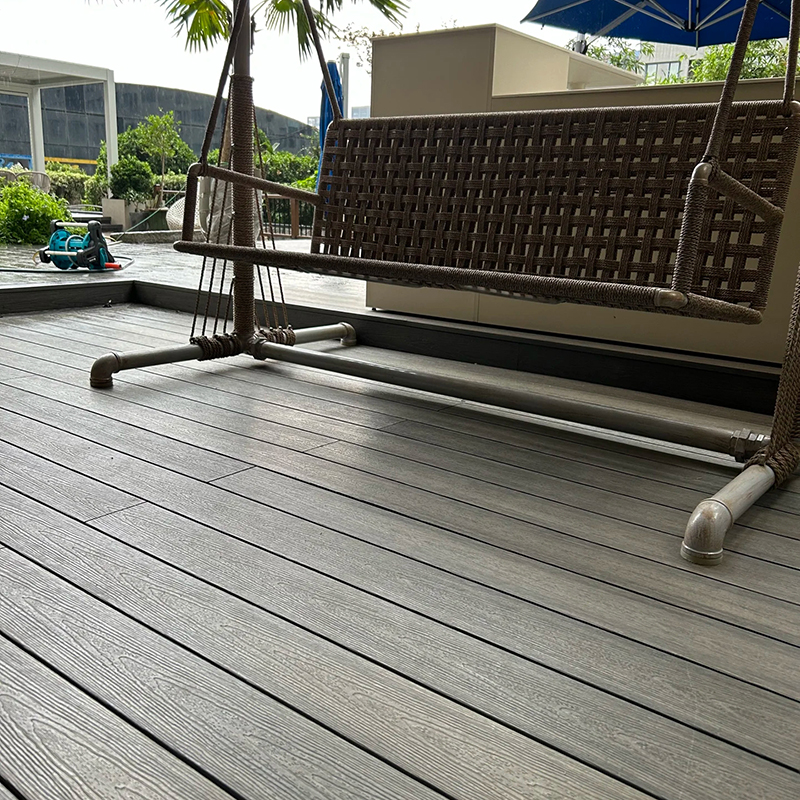
Upgrading an outdoor living space requires balancing speed of installation alongside long-term structural integrity. You want a stunning exterior makeover quickly. You also need materials tough enough to endure heavy foot traffic and harsh weather. A DIY-friendly WPC deck tile system offers enormous appeal for these exact reasons. However, a successful, lasting result depends heavily on surface preparation and proper interlocking technique. A secure installation prevents shifting, warping, and drainage issues down the line.
In this comprehensive guide, we will walk you through the essential steps required to prepare your sub-surface. We will explain how to install these materials correctly. You will learn exactly how to measure your space, handle custom cuts, and securely lock everything for a flawless finish. By mastering these fundamentals, you can transform a basic patio into a durable, professional-grade living area.
Key Takeaways
Surface Preparation is Non-Negotiable: A level, adequately drained sub-surface dictates the lifespan and stability of your outdoor flooring tiles.
Acclimation Matters: WPC (Wood Plastic Composite) materials require time to adjust to local temperature and humidity before locking them into place.
Tool Requirements are Minimal: Standard DIY tools (tape measure, rubber mallet, jigsaw) are sufficient for full installation and custom edge cutting.
Built-in Drainage is a Feature, Not a Fix: The grid base allows water flow, but underlying subfloor pooling must be addressed prior to installation.
Evaluating Sub-Surface Conditions and Viability
Concrete, brick, and existing wood make the ideal base for interlocking deck tiles. You must assess the area for severe cracking or pooling water. Check for surface deviations greater than 1/4 inch per 10 feet. Use a long straightedge to spot uneven areas accurately. Address minor divots quickly by applying a reliable self-leveling compound. Smooth surfaces prevent individual units from bouncing underfoot. A bouncing surface eventually breaks the plastic locking tabs over time.
Softscapes present a different challenge altogether. Grass, dirt, and gravel need careful ground modification. Installing directly over deep grass compromises overall stability. They sink unevenly under weight. They shift during heavy rain. To fix this, you must excavate the topsoil first. Dig down several inches to remove soft organic matter. Lay a compactable base using crushed stone. Tamp it down firmly until it feels rigid. Next, apply a high-quality weed barrier membrane over the crushed stone. This membrane prevents weeds from pushing up through the grid later.
Drainage assessment remains critical for any base type. Confirm the underlying surface maintains a slight grade. A 1-2% slope typically directs water safely away from adjacent building foundations. Standing water damages subfloors rapidly. It also creates ideal breeding grounds for mosquitoes under your patio.
Surface Type
Primary Action Required
Red Flags to Watch For
Concrete & Brick
Fill cracks and level divots
Deviations over 1/4 inch, pooling water
Existing Wood Deck
Replace rotting boards
Protruding nails, severe wood warp
Grass & Dirt
Excavate and lay crushed stone
Soft mud, active weed growth, poor compaction
Loose Gravel
Tamp down and apply weed barrier
Shifting stones, lack of solid edge containment
Planning, Measuring, and Tool Staging
Proper planning saves you significant time during installation. Calculating your square footage accurately prevents mid-project material shortages. Measure the length and width of the outdoor area carefully. Multiply them to get your total square footage. Always apply the standard industry rule for flooring projects. Add a 10% overage to your total calculation. This extra 10% covers custom cuts, angled corners, and future tile replacement needs. Running out of materials delays your project by days or weeks.
Having the right tools nearby keeps your momentum going. Tool requirements remain surprisingly minimal. You likely already own most of them.
Rubber mallet: Use this for securing the snap-lock system. It avoids marring the composite finish.
Jigsaw or circular saw: Equip it featuring a fine-tooth blade. You need it for cutting units around pillars, pipes, or curved edges.
Tape measure: Essential for layout planning and checking squareness.
Chalk line: Helps maintain straight rows over large patios.
Safety goggles: Protect your eyes during cutting phases.
Material acclimation plays a massive role in long-term success. Store your composite flooring outside in the installation area for 24–48 hours before starting. Wood plastic composites react to environmental changes constantly. They undergo thermal expansion and contraction. Allowing them to adjust to local temperature and humidity prevents unexpected buckling. If you skip this step, expanding units might snap their locking mechanisms on a hot day.
The Step-by-Step Installation Process
Now we move to the physical layout. This phase moves quickly if you prepared the ground properly. Following a strict sequence ensures a tight, professional appearance.
Establishing the Starting Point: Begin at an exact 90-degree corner. We recommend starting against the most visible wall or edge. Point the female loops of the tile outward toward the unlaid area. This specific orientation facilitates continuous clicking as you move across the space. It prevents awkward backwards installations.
Engaging the Interlocking Mechanism: Align the male tabs of the second tile over the female loops of the first. Press down firmly on the connection seam. Use your rubber mallet to tap the edges gently. Stop when a clear "click" is felt and heard. This distinct sound verifies the lock is fully engaged. Do not use a steel hammer. It will shatter the plastic loops.
Scaling the Layout: Work outward using a fan or row pattern. Periodically check your alignment using a chalk line. Over longer distances, slight shifts compound into noticeable curves. A chalk line ensures the grid remains perfectly square as your new patio tiles cover the yard. Step back frequently to view the overall pattern.
Working systematically prevents mistakes. If you encounter a stubbornly locked joint, do not force it down blindly. Lift the unit slightly. Check the female loops for hidden debris. A small pebble prevents the male tab from seating properly. Clear the obstruction and try the connection again. This patience preserves the plastic tabs. Keeping the work area clean during this process prevents debris from falling into the interlocking joints. Sand or pebbles inside the joints prevent a secure connection.
Custom Cuts and Obstacle Management
You rarely find a perfectly square outdoor space. Posts, downspouts, and irregular walls require custom fitting. Professional-looking results depend on how well you manage these obstacles.
Marking your cuts accurately saves valuable material. Flip the unit upside down. Trace the exact profile of the obstacle directly onto the plastic base. This reversed tracing provides a perfect template for your saw. For complex curves, create a cardboard template first. Transfer the cardboard shape onto the plastic base to avoid costly mistakes.
Cutting technique requires a steady hand and patience. Use a jigsaw to cut through both the WPC slats and the underlying plastic grid. Go slowly to avoid melting the plastic base. Ensure your cut does not entirely sever the structural plastic base screws. If a cut line crosses a screw hole, reposition the base screws internally. Simply drill a small pilot hole nearby. Move the screw to the new hole. This maintains slat stability.
Securing small pieces demands extra attention. A complex cut might leave a very small sliver of material. Evaluate if construction adhesive is required to anchor it. Small slivers often lose their native snap-lock capability. Glue them directly to the adjacent unit's base. This prevents them from kicking loose under heavy foot traffic.
Obstacle Type
Recommended Tool
Pro Cutting Technique
Straight Wall Edge
Circular Saw
Use a guide rail for a perfectly straight line.
Round Drain Pipe
Jigsaw
Create a cardboard template first, then trace and cut slowly.
Deck Post Corner
Jigsaw
Cut an L-shape notch. Reinforce internal base screws if severed.
Edge Finishing and Mitigating Installation Risks
A raw edge looks unfinished and poses serious safety risks. Handling exposed edges elevates the entire project instantly. Apply compatible WPC edge trims, fascia boards, or transition ramps to exposed sides. These additions eliminate tripping hazards entirely. They also seamlessly conceal the underlying plastic base from view. Transition ramps provide smooth access for wheelchairs and strollers.
You must account for thermal expansion carefully. Leave a 1/2-inch expansion gap between the laid surface and any fixed structures. This rule applies to walls, heavy planters, and support columns. WPC materials expand when exposed to direct sunlight. Without this gap, the expanding surface pushes against walls. The resulting pressure forces the center sections to buckle upward dramatically.
Avoiding common failures protects your financial investment. One major risk involves laying materials over loose sand. Sand moves constantly. It causes sinking and unclicking of the joints. Another serious risk involves trapping water underneath. Never block the plastic grid's drainage channels. Sweep the subfloor clean before you begin. Clear away leaves, dirt, and construction debris. Blocked channels cause water pooling, mold growth, and unpleasant odors over time.
Regularly inspect your perimeter expansion gaps during seasonal changes. Debris often accumulates inside these small spaces during autumn. Pine needles and fallen leaves pack tightly into the gap. This organic matter hardens and restricts natural thermal expansion. Use a narrow vacuum attachment or a stiff brush to clear these perimeters annually.
Conclusion
The success of a WPC tile project hinges heavily on meticulous pre-planning. Sub-surface leveling matters far more than the locking process itself. A flawless interlocking mechanism cannot compensate for a bumpy, poorly drained foundation.
Take the time to review your specific space constraints carefully. Calculate exact material yields before starting. Always ensure subfloor drainage issues are completely resolved before purchasing your materials. Doing so guarantees a long-lasting, visually stunning outdoor space.
Order sample outdoor flooring tiles today. Test the locking mechanism yourself. Visualize the composite finish in your actual outdoor lighting conditions before making a final commitment.
Review these final action steps to guarantee success:
Assess and level your sub-surface completely before ordering.
Acclimate materials outdoors for two full days to prevent buckling.
Purchase 10% extra material to cover custom cuts and errors.
Leave proper expansion gaps near all fixed walls and columns.
Apply compatible transition trims to all exposed edges for safety.
FAQ
Q: Can I install WPC deck tiles directly on grass?
A: Directly over thick grass is not recommended as it creates an unstable, shifting surface. The grass should be removed, the ground leveled with compacted gravel, and a weed barrier installed first.
Q: How do I clean and maintain the area beneath the tiles?
A: For routine maintenance, wash with a hose; the grid base allows water and small debris to wash away. For deep cleaning, the interlocking tiles can be unlocked, lifted, and reinstalled.
Q: Do outdoor flooring tiles expand in the heat?
A: Yes, composite materials expand and contract with temperature changes. A perimeter gap of roughly 1/2 inch must be left against solid walls to prevent buckling.
Q: What is the best tool for cutting composite deck tiles?
A: A jigsaw with a fine-toothed wood or plastic-cutting blade provides the cleanest cut for complex curves or straight edge trims without splintering the WPC material.